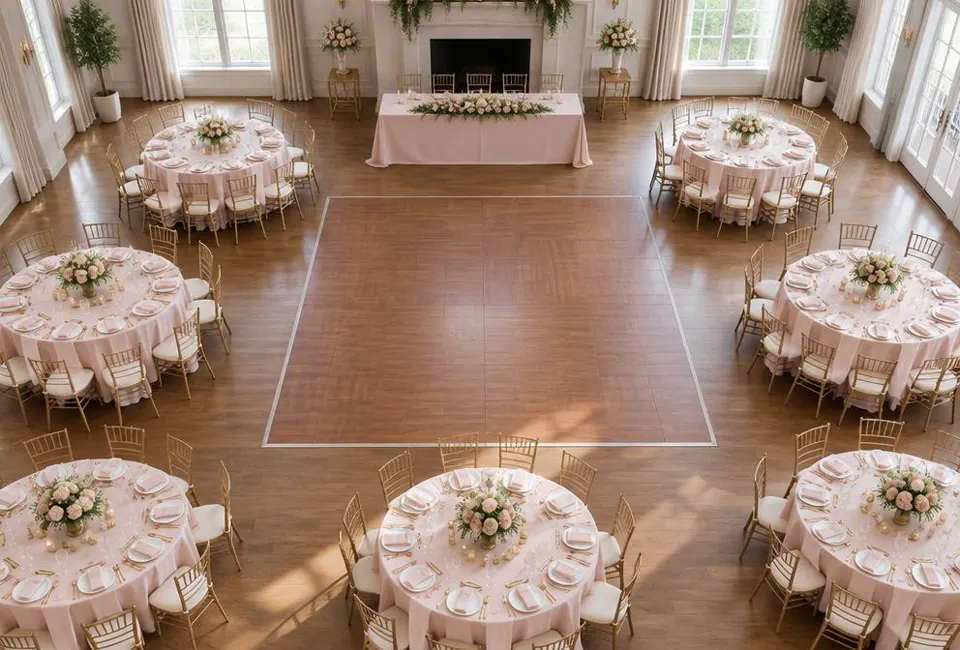
Spatial Requirements and Essential Formulas
Creating a professional wedding floor plan guide begins with precise calculations to ensure guest comfort and operational flow. Mastering these spatial formulas prevents overcrowded rooms and ensures your catering team can navigate the space effectively.
The foundation of any wedding layout is the guest density ratio. For a traditional seated dinner with service aisles, the global standard is 1.4 square meters per person. This figure accounts for the chair, the table surface, and the critical buffer zone behind each guest for servers to pass safely. If you are hosting a standing cocktail reception, the requirement drops significantly to 0.5 square meters per person. Using these metrics allows you to instantly determine if a venue is viable before signing a contract. A 200 square meter room might seem vast, but once you subtract space for a stage and bar, the remaining area must strictly align with these mathematical limits to avoid a fire hazard or a cramped atmosphere.
The Capacity Calculation Framework
| Reception Style | Space per Guest | Total for 100 Guests | Best Application |
|---|---|---|---|
| Seated Banquet | 1.4 sq meters | 140 sq meters | Full course service |
| Cocktail Party | 0.5 sq meters | 50 sq meters | High energy standing |
| Theater Style | 0.7 sq meters | 70 sq meters | Ceremony only |
| Dance Floor | 0.4 sq meters | 40 sq meters | Active zones only |
When choosing between long banquet tables and round tables, room dimensions dictate the winner. Round tables, typically 1.5 to 1.8 meters in diameter, are excellent for conversation but consume more 'dead space' in the corners of a room. Long rectangular tables are superior for narrow, industrial spaces because they can be lined up to create clear, linear walkways. If your venue is a long loft, long tables allow you to maximize the length while keeping the width open for movement. Conversely, in a perfectly square ballroom, round tables help soften the perimeter and create a centralized focal point for the couple.
Consider the scenario of Sarah and Mark, who booked a narrow 200 square meter urban loft for 150 guests. At 1.4 square meters per person, their seated dinner requires 210 square meters, already exceeding the total room size without even adding a dance floor. By applying the service clearance rule, they realized that round tables would create bottlenecks against the long walls. They decided to use three long rows of banquet tables running parallel to the windows. This configuration reclaimed 15 percent of the floor space compared to rounds, providing enough room for a small band and a clear path for the waitstaff to reach the kitchen without squeezing past chairs.
Floor Plan Math Checklist
- Measure the total usable square meters excluding fixed pillars.
- Subtract 15 square meters for every mobile bar station.
- Calculate seated guest space using the 1.4 multiplier.
- Verify 1.5 meters of clearance between all table rows.
- Ensure the dance floor accommodates 40 percent of guests at once.
- Check that emergency exits are not blocked by seating.
- Confirm the DJ or band area has a 3 meter depth buffer.
- Map the primary path from the kitchen to the farthest table.
Ultimately, the spatial logic you apply now prevents logistical headaches on the wedding day. While budgets vary significantly, such as the UK average of 20,600 pounds according to Bridebook 2024 or the Australian average of 35,315 Australian dollars per Easy Weddings 2025, the physics of space remains constant. Whether you are in a high end hotel or a backyard, prioritizing the flow of people over decorative excess ensures that guests feel relaxed rather than trapped. Always leave more space than you think you need. A room that feels 80 percent full is vibrant, whereas a room that is 100 percent full often feels chaotic and uncomfortable for everyone involved.
Zoning the Celebration: Defining Activity Hubs
Creating a professional wedding floor plan guide requires more than just fitting tables into a room; it demands a strategic division of space into functional activity hubs. By categorizing the venue into high energy, low energy, and service zones, couples can ensure a natural flow that prevents congestion and enhances the guest experience.
The high energy zone serves as the heartbeat of the reception, encompassing the dance floor and the bar. These two elements should be placed in close proximity to keep the momentum of the party alive. When the bar is too far from the music, the crowd splits, leading to a sparsely populated dance floor. However, avoid the common mistake of placing the bar in a dead end corner. This creates a physical bottleneck where guests entering the line collide with those trying to leave with drinks. Instead, position the bar in an open area with 360 degree access or along a long wall with clear entry and exit paths.
Low energy zones provide a necessary sanctuary for guests who prefer conversation over choreography. This area includes the dining tables and lounge furniture. To maximize comfort, place these zones furthest from the speakers to allow for easier verbal communication. Consider a couple like Sarah and David, who designed their layout with a buffer of lounge seating between the loud dance floor and the elderly relatives at the back tables. This intentional gap ensures that guests who are finished dancing have a place to transition without feeling like they have left the party entirely.
Optimizing Service and Vendor Flow
The service zone is the invisible engine of the wedding. It includes kitchen access points, clearing stations, and vendor storage areas. A successful wedding floor plan guide must account for the path of travel for catering staff. If the kitchen door opens directly onto the back of the head table, the couple will be distracted by the constant movement of plates and tray stands. Map out a clear, unobstructed three foot wide lane from the kitchen to all dining areas. Ensure this path does not intersect with the high traffic route between the bar and the dance floor to prevent collisions.
| Zone Category | Primary Elements | Ideal Placement | Key Restriction |
|---|---|---|---|
| High Energy | Dance Floor, Bar, DJ | Central or near main entry | Avoid dead end corners |
| Low Energy | Dining, Lounge, Photo Booth | Perimeter or quiet corner | Away from main speakers |
| Service | Kitchen, Bus Tubs, Storage | Near back exits | Hidden from guest sightlines |
| Stationary | Cake Table, Guest Book | High visibility transition spots | Not in main traffic lanes |
The cake table requires a unique spatial strategy. It needs to be visible for photography and the formal cutting ceremony, but it should not be a permanent obstacle. A common error is placing the cake in the center of the dance floor, which forces staff to move a heavy table while the party is in full swing. Instead, place the cake table in a transition area, such as the space between the dining zone and the dance floor. This ensures it is a focal point during the first hour but remains safely out of the way once the high energy dancing begins.
Vendor Communication Script for Zoning
- To the Venue Manager: Please confirm the primary service exit and ensure no guest tables are within four feet of this door for safety.
- To the DJ: We have designated the north end as the high energy zone. Please angle speakers away from the lounge area in the south corner.
- To the Caterer: The bar is placed in an open flow configuration to prevent bottlenecks. Please ensure your staff uses the side service lane for clearing glassware.
- To the Photographer: The cake is positioned in a transition zone for natural light, but please alert us if you need it moved before the dancing starts.
- To the Decorator: Ensure lounge furniture stays within the low energy perimeter to keep the fire exit paths clear.
Budgetary considerations often dictate how much space you can allocate to these zones. According to The Knot Real Weddings Study 2025, the US average wedding cost is about $33,000, while Bridebook 2024 reports the UK average at about £20,600. For couples in Australia, Easy Weddings 2025 notes a cost of A$35,315, and RBC reports Canada at about C$30,000. Regardless of total spend, approximately 15 percent of your floor space should be dedicated to circulation and service lanes. Prioritizing these non guest areas prevents the venue from feeling cramped and ensures the logistics remain seamless throughout the night.
The Geometry of Seating: Rounds versus Rectangles
The third section of the wedding floor plan guide addresses the mathematical and social implications of table selection, balancing intimacy with spatial efficiency.
The Geometry of Seating: Rounds versus Rectangles
When building a wedding floor plan guide, the primary conflict often arises between guest comfort and venue capacity. Round tables remain a global standard because they lack a head position, which fosters a democratic and flowing conversational environment. However, these shapes are mathematically less efficient than their angular counterparts. Round tables generally require 15 percent more floor space than rectangular banquet tables because their circular footprints create dead zones of unusable space between them. For couples working with tight perimeters, every centimeter counts toward the final density of the room.
Rectangular tables, often referred to as banquet or trestle tables, offer a structured aesthetic that mimics long family style dining. These units can be pushed together to create continuous rows, effectively utilizing every corner of a venue. While they maximize the guest count within a fixed square meterage, they can limit dialogue. A guest at a long table typically only speaks with the three people directly across and the two neighbors to their sides. Selecting between these two depends largely on whether the priority is social versatility or maximizing the capacity of a restrictive hall.
Consider the scenario of Aisha and Leo, who selected a converted industrial warehouse for their celebration. The venue featured several irregular nooks and supporting pillars that created a jagged floor plan. Rather than sticking to a uniform layout, they utilized a mixed shape strategy. They placed large rounds in the wider central areas to anchor the room and encourage group chatting. In the narrow corridors and tight alcoves, they deployed long rectangular tables. This hybrid approach allowed them to fit an additional twenty guests without making the room feel congested or blocking the natural flow of traffic.
| Table Shape | Space Efficiency | Social Dynamic | Best Use Case |
|---|---|---|---|
| 60 inch Round | Low | High group interaction | Open ballrooms |
| 72 inch Round | Very Low | Difficult cross table talk | Large guest counts |
| 6 foot Rectangle | High | Focused peer dialogue | Narrow galleries |
| 8 foot Rectangle | Very High | Communal feast feel | Outdoor long rows |
| Square | Medium | Intimate and modern | Small boutique spaces |
Regardless of the chosen shape, the most frequent error in a wedding floor plan guide is neglecting the service and movement lanes. Guests do not remain static. They push chairs back to stand, wait staff pass with heavy trays, and friends lean over to whisper to neighbors. Overcrowding a room leads to a frustrating experience where guests feel trapped. To avoid this, designers must map out a buffer zone around every seated individual. This ensures that the aesthetic beauty of the table arrangement does not collapse once the room is actually populated by moving bodies.
Essential Chair Clearance and Comfort Standards
- Ensure 60 centimeters of clearance between the chair back and the nearest obstacle.
- Allow 45 centimeters of depth for the chair itself when tucked in.
- Maintain 90 centimeters of width for primary service aisles between table rows.
- Verify that guests at rectangular tables have 60 centimeters of elbow room each.
- Check that round tables are spaced at least 150 centimeters apart from center to center.
- Confirm no chair backs are placed directly against emergency exit paths.
- Account for the additional space required for high chairs or mobility aids.
- Test the clearance for wait staff to pass behind a guest who is fully seated.
- Measure the distance to the dance floor to prevent chair bumping during high energy songs.
Finalizing the geometry of your seating requires a honest look at the guest list and the menu style. Plated service requires more significant aisle width for servers than a buffet, where guests do the moving. Use the 15 percent space savings of rectangles if you are nearing the maximum capacity of your venue. Otherwise, lean into the rounds for a softer look. By prioritizing these technical clearances, you ensure that the physical layout of the wedding supports the social goals of the evening rather than hindering them through cramped quarters or poor visibility.
Acoustic and Visual Sightlines
Optimizing the sensory experience of a wedding involves more than just layout. It requires a strategic approach to sound distribution and unobstructed lines of sight.
Acoustic Mapping for Multigenerational Comfort
The placement of your DJ or live band dictates the energy of the room but can inadvertently alienate guests if not planned with precision. A common mistake in a wedding floor plan guide is placing the entertainment directly adjacent to the eldest family members. Instead, position the speakers to face the dance floor directly, using the dance area as a buffer zone. For a couple like Mateo and Elena, this meant placing the DJ booth at the far end of the hall, with the wedding party tables flanking the dance floor and the grandparents seated at the opposite end of the room near the entrance. This allows for clear sound where needed without causing physical discomfort to those with sensitive hearing.
To achieve balanced sound distribution, consider the physics of the venue. High ceilings and hard surfaces like marble or glass reflect sound, creating echoes that make conversation difficult. If your venue has these features, work with your audio vendor to use smaller, distributed speakers rather than two massive stacks. This setup allows for a lower overall volume while maintaining clarity throughout the space. The goal is to ensure that while the dance floor feels immersive, guests seated at their tables can still engage in comfortable conversation. Always test the sound levels from the furthest table during your soundcheck to verify that the music does not overwhelm the room.
Maximizing Visibility and Connection
Sightlines are often compromised by traditional linear seating. For the ceremony, move away from the rigid rectangular block. Implementing a V-shaped or chevron seating arrangement involves angling the chairs toward the center aisle. This subtle shift ensures that guests in the back rows have a clear view of the couple without peering over the heads of those in front. This framework also creates a more intimate, inclusive atmosphere as guests can see each other's reactions. In the reception space, the sweetheart table should be integrated into the room rather than isolated. Placing the couple more than three meters away from the nearest guest table creates a visual disconnect that can make the event feel performative rather than communal.
Critical Sightline Audits
- Sit in the furthest corner chair to ensure the cake cutting and speeches are visible.
- Verify that the photographer's primary standing positions do not block the view of the parents.
- Check that large pillars or architectural features do not bisect the view of the sweetheart table.
- Measure the height of table numbers to ensure they do not block the couple during toasts.
- Ensure the projector screen for slideshows is elevated at least two meters above the floor.
- Confirm that floral installations on the floor do not create tripping hazards in high traffic aisles.
When positioning the couple, consider the flow of the evening. If the sweetheart table is tucked into a corner or placed on a high stage, it can feel inaccessible. A better approach is to centralize the couple along the longest wall, keeping them at the same floor level as their guests. This encourages natural movement and spontaneous interactions throughout the night. By prioritizing these visual links, you ensure that every guest, regardless of their seat assignment, feels like an active participant in the celebration. Remember that a well planned wedding floor plan guide focuses on the experience of the guest as much as the aesthetics of the couple.
| Feature | Common Mistake | Optimal Strategy | Impact |
|---|---|---|---|
| DJ Placement | Next to elderly seating | Facing dance floor only | Prevents ear fatigue |
| Centerpieces | 45cm height (eye level) | Below 30cm or above 60cm | Facilitates conversation |
| Ceremony Seats | Straight 90 degree rows | Chevron or V-shaped angle | Improves rear visibility |
| Sweetheart Table | Isolated on a far stage | Integrated near guest rows | Maintains social warmth |
Accessibility and Universal Design Integration
True inclusivity in a wedding floor plan guide goes beyond basic compliance, ensuring that every guest can navigate the celebration with dignity and ease. By prioritizing universal design, you create an environment where barriers disappear and the focus remains entirely on the celebration.
Universal design principles transform a floor plan from a simple layout into a welcoming space for all generations. A critical requirement for any inclusive wedding is the implementation of 90-centimeter minimum widths for all primary walkways. This measurement is not arbitrary: it provides the necessary clearance for wheelchairs, motorized mobility aids, and individuals using walkers to move without friction. When drafting your layout, treat these 90-centimeter paths as non-negotiable arteries that connect the ceremony site to the reception area and the food service zones. Narrow gaps between tables or tight corners near the bar often create bottlenecks that exclude guests with limited mobility.
Navigating Elevation and Directional Clarity
Ramp placement is another pillar of accessible design that requires early planning. Ramps should never be an afterthought tucked away in a service corridor. Instead, integrate them into the main flow of guest traffic to avoid segregating those who cannot use stairs. Clear signage acts as the final layer of this inclusive strategy. High-contrast, large-print signs placed at eye level help guests with visual impairments or cognitive differences navigate the venue independently. Use universal symbols alongside text to denote restrooms, exits, and quiet zones, ensuring that the floor plan is legible to everyone regardless of their primary language or physical ability.
| Feature | Minimum Requirement | Purpose | Common Oversight |
|---|---|---|---|
| Primary Walkways | 90 centimeters | Wheelchair and walker clearance | Blocking paths with floral pedestals |
| Ramp Gradient | 1:12 ratio | Safe and effortless ascent | Making ramps too steep for manual use |
| Table Clearance | 150 centimeters | Room for chair pull-out plus transit | Clustering tables too close to walls |
| Signage Height | 120 to 150 centimeters | Visibility for seated and standing guests | Placing signs behind decor or lighting |
| Stable Flooring | Firm and level | Prevents tripping and wheel sinking | Using deep gravel or thick shag rugs |
Consider the scenario of Elena and David, who planned a garden wedding at a historic estate. During their floor plan audit, they realized the path from the central lawn to the restrooms consisted of loose wood chips, which are difficult for guests using canes or wheelchairs to navigate. To solve this, they worked with their rental company to install a temporary stabilized walkway. By laying down interlocking wooden planks that provided a firm, flat surface, they ensured that their elderly relatives could move between the party and the amenities without needing physical assistance. This proactive adjustment turned a potential barrier into a seamless part of the landscape.
Universal Design Integration Checklist
- Confirm all primary aisles are at least 90 centimeters wide.
- Ensure ramps are located at all changes in floor elevation.
- Check that the flooring surface is firm enough for wheels.
- Verify that accessible restrooms are within 50 meters of the reception.
- Place high-contrast signage at all major transition points.
- Reserve seating at the ends of rows for guests with mobility aids.
- Audit the path to the bar for reachable counter heights.
- Designate a quiet space for guests with sensory sensitivities.
- Remove low-hanging decor that could be a head-level hazard.
Effective universal design also addresses the height of furniture and interactions. Standard high-top cocktail tables are often unusable for guests in wheelchairs. Your floor plan should incorporate a mix of heights, including standard 75-centimeter tables in the cocktail area. Similarly, ensure the wedding cake or guest book station is at a height that is accessible from a seated position. By thinking through these touchpoints during the design phase, you avoid the need for last-minute improvisations on the wedding day. This level of detail shows a profound respect for the diverse needs of your guest list, ensuring everyone feels fully invited to participate.
Mapping for Vendor Operational Success
A successful wedding floor plan guide must address the invisible movement of the twenty to thirty staff members required to execute a high end celebration. This section transforms your layout into a functional blueprint that ensures catering, entertainment, and decor teams can perform their roles without obstructing the guest experience.
While most couples focus on guest comfort, the back of house requirements dictate whether the meal is served hot or the music stays powered. A floor plan is a logistical roadmap for the army of professionals working behind the scenes. For a typical wedding, you are managing a team equivalent to a small business staff. If the catering team cannot navigate from the kitchen to the tables without dodging the photobooth line, service will slow down and the atmosphere will suffer. Consider the needs of every vendor as equal to the needs of your VIP guests to ensure a seamless flow.
The Three Meter Rule for Catering Excellence
Catering teams require a dedicated buffer zone to function safely and efficiently. Imagine a couple like Sarah and David who chose a narrow historic gallery. They initially packed tables right up to the kitchen swing doors. We recommend a minimum three meter buffer zone between the kitchen exit and the first guest table. This space allows servers to exit with heavy trays, organize plating stations for final garnishes, and clear dirty dishes without clashing with guests. In this buffer, avoid placing high traffic items like guest book tables or gift stations, as these create bottlenecks that risk accidents.
| Vendor Category | Space Requirement | Power/Utility Needs |
|---|---|---|
| Live Band | 6m x 4m Stage Area | 3 to 4 Dedicated 20A Circuits |
| Catering Plating | 3 Meter Clear Buffer | Access to Potable Water Source |
| DJ Setup | 2.5m x 2.5m Area | 2 Dedicated Circuits near Booth |
| Floral Design | 2m Prep Table Space | Cool Environment, Non-Carpeted |
| Photo Booth | 3m x 3m Footprint | Standard Outlet within 5 Meters |
Power management is another critical component often overlooked in the wedding floor plan guide. Musicians and DJs do not just need a corner; they need dedicated circuits. A high energy live band can easily trip a standard breaker if they share a circuit with the catering coffee urns or heavy lighting rigs. When plotting the stage, mark the exact locations of wall outlets. If the venue is an older estate or an outdoor marquee, you may need to plan for a generator or specific cable ramps to prevent guests from tripping over necessary wiring that must cross a walkway.
Load in and load out routes are the final piece of the operational puzzle. You must verify that your floor plan does not block the widest paths needed for large equipment. For example, a couple named Elena and Marcus found that their elaborate floral arch blocked the only path for the band to bring in their drum kits. Use this script when speaking to your venue manager: We need to map the primary load in route for our heavy equipment vendors. Which entrances have the fewest stairs, and are there any floor plan configurations that would block the path for a standard two wheel dolly or a large floral cart?
Vendor Operational Floor Plan Audit
- Verify a 3 meter clearance exists between the kitchen door and guest seating.
- Confirm the stage area has at least three dedicated power circuits for the band.
- Mark all electrical outlet locations on the master floor plan.
- Ensure the load in route remains clear of decorative installations.
- Check that the DJ has a clear line of sight to the entrance for grand introductions.
- Allocate a 2m x 2m 'dead space' for catering tray stands near the dining area.
- Map a discrete path for the photographer to move around the perimeter.
- Identify a secure, out of sight area for vendor meal service and breaks.
Ultimately, the success of your event hinges on how well your vendors can communicate and move within the space. When you share the final floor plan, include a version that highlights these operational zones. This prevents last minute shifts on the wedding day where a band might move a table to reach a plug or a caterer might set up a prep station in a guest walkway. A well planned operational layout allows your staff to work efficiently, which translates directly into a better experience for you and your guests as they enjoy the celebration.
The Final Walkthrough and Iteration Process
The final stage of your wedding floor plan guide involves transitioning from digital sketches to the physical reality of your venue. This phase ensures that your theoretical measurements hold up under the pressure of actual furniture and fluctuating guest lists.
The Physical Verification and Taping Method
Schedule your final walkthrough thirty days before the event. Bring a roll of blue painter tape and your master floor plan. For a real world application, consider a couple like Sarah and Omar who discovered their venue pillars were ten centimeters wider than the blueprints suggested. To avoid day of congestion, physically tape out the footprint of your largest tables. Place a piece of tape at the center point and four marks at the outer edges of the chairs when pulled out. Walk between these taped zones to ensure a natural flow for servers and guests. If the paths feel narrow, adjust your digital map immediately.
Last minute changes to the guest count are inevitable. Use a simple decision tree to manage these shifts without redesigning the entire room. If your count decreases by more than ten percent, remove one entire table and redistribute guests to fill gaps. If the count increases, add chairs to existing tables rather than squeezing in a new table that blocks a fire exit. Always prioritize the comfort of the seated guests over the symmetry of the room. A slightly lopsided layout is far better than a guest being unable to push their chair back without hitting a wall.
| Scenario | Threshold | Action Plan | Operational Impact |
|---|---|---|---|
| Minor Drop | 1 to 5 guests | Distribute empty seats evenly | Minimal; adjust place settings |
| Major Drop | 8 to 12 guests | Remove one full table | Reduces rental costs; increases space |
| Minor Increase | 1 to 4 guests | Add chairs to existing rounds | Tightens elbow room; no layout change |
| Major Increase | 10 plus guests | Introduce a perimeter table | Requires new floral and linen order |
The Rainy Day Contingency Plan
A rainy day floor plan must be executable in under 45 minutes to maintain the event timeline. This plan usually involves moving an outdoor ceremony into the indoor reception space. To achieve this without disturbing the dinner setup, utilize a flip strategy. Designate a lounge area or the dance floor as the temporary ceremony site. Arrange guest chairs in rows facing a focal point that does not interfere with the set dining tables. For example, Elena and Marcus planned their ceremony on the dance floor, allowing guests to transition directly to their assigned tables for a cocktail hour while staff removed ceremony chairs.
Final iteration requires clear communication with your catering lead and coordinator. Provide them with a finalized PDF that includes a color coded key. Use one color for standard dining, another for the rainy day ceremony overlay, and a third for the evening dance floor expansion. This clarity prevents confusion during the high pressure setup window. Confirm that all vendors have the same version number of the document. A common mistake is a florist working off an outdated version while the caterer uses the new one. Synchronization is the final key to a seamless execution.
Final Walkthrough Action Items
- Verify all electrical outlet locations for the DJ and lighting.
- Measure the exact width of the main entrance for guest flow.
- Confirm the 'Plan B' ceremony orientation with the venue manager.
- Check that the handicap ramp access is not blocked by decor.
- Test the Wi-Fi signal strength at the tech booth area.
- Tally the total chair count against the final RSVP list.
- Ensure the kitchen swing doors have a clear three foot radius.
- Designate a specific spot for the gift table near the entrance.
- Double check that the cake table is away from direct sunlight.